
Abacus
T-SHIRT SIZING IN JIRA FOR AGILE ESTIMATION
Jan 05, 2021
Estimating work is one of the hardest – and most important - operations for an Agile team to get right. While story points can be a trustworthy companion to your team, they're not a one-size-fits-all solution. What if your team wants the flexibility to estimate on their own terms, in their own language? In this post, we'll demonstrate how Abacus enables teams using Jira to estimate effort however they like - without sacrificing any of Jira's excellent built-in story point integrations.
T-Shirt Size Estimation
Avoiding analysis-paralysis during the effort estimation phase is important. While constraining your story points to a scale based on the Fibonacci sequence can help teams estimate efficiently, some teams prefer doing away with number-based estimation altogether. T-shirt sizes make for a quick and universally-understood system for estimating the level of effort required to complete a task. Teams estimating with T-shirt sizes use the values S, M, L, XL and XXL to express a tasks required effort.
Creating a custom field in Jira using these sizes is a straightforward procedure for a Jira admin. This gives your team the desired estimation scale, but it has a major flaw – there is no longer a numeric field for Jira to use in creating reports.
Abacus to the Rescue!
With Abacus' mapping feature, teams can have the best of both worlds - simple, non-numeric estimation AND reports based on the estimation values!
Here's how:
1. Create a custom field for T-Shirt Sizes
Begin by creating a Select List (single choice) custom field for the T-Shirt sizes. If you need assistance creating a custom field and associating it with your projects screens, check out the Atlassian documentation: Adding a Custom Field and Configuring a Custom Field.
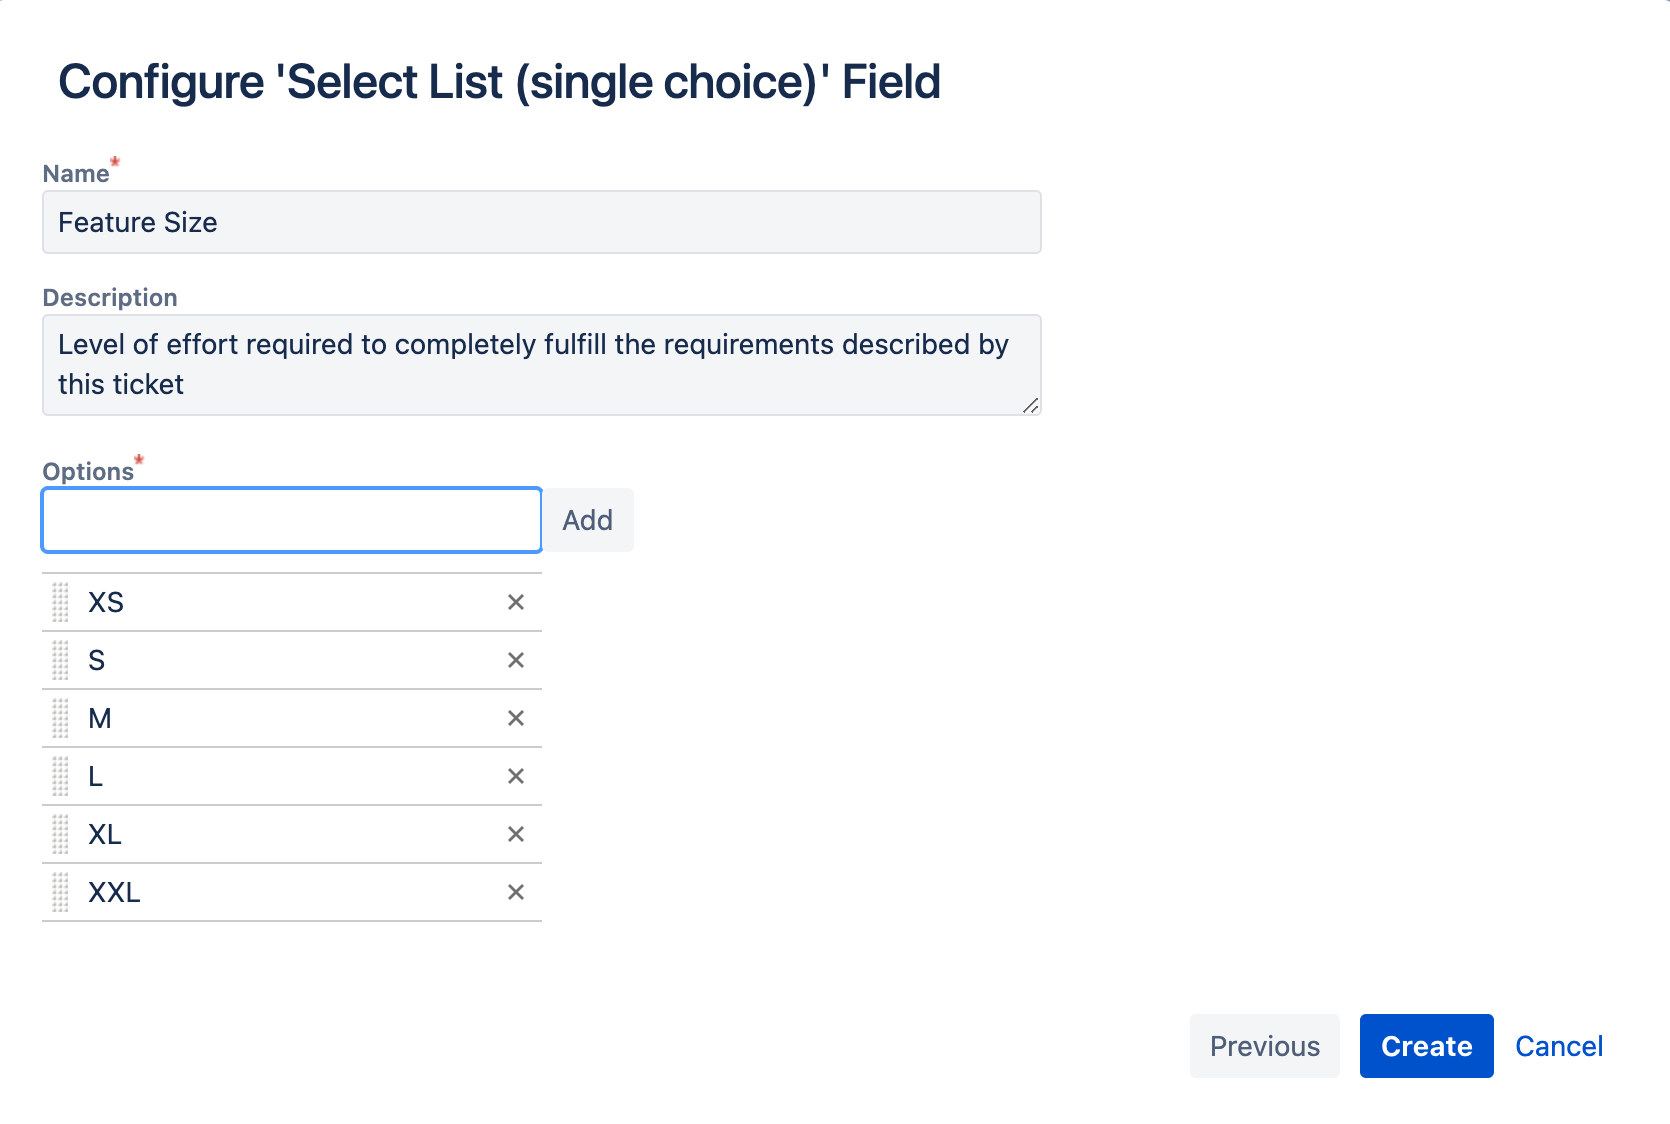
Your custom field should look something like this
Feel free to omit the XS and/or XXL sizes if your team doesn't find them valuable!
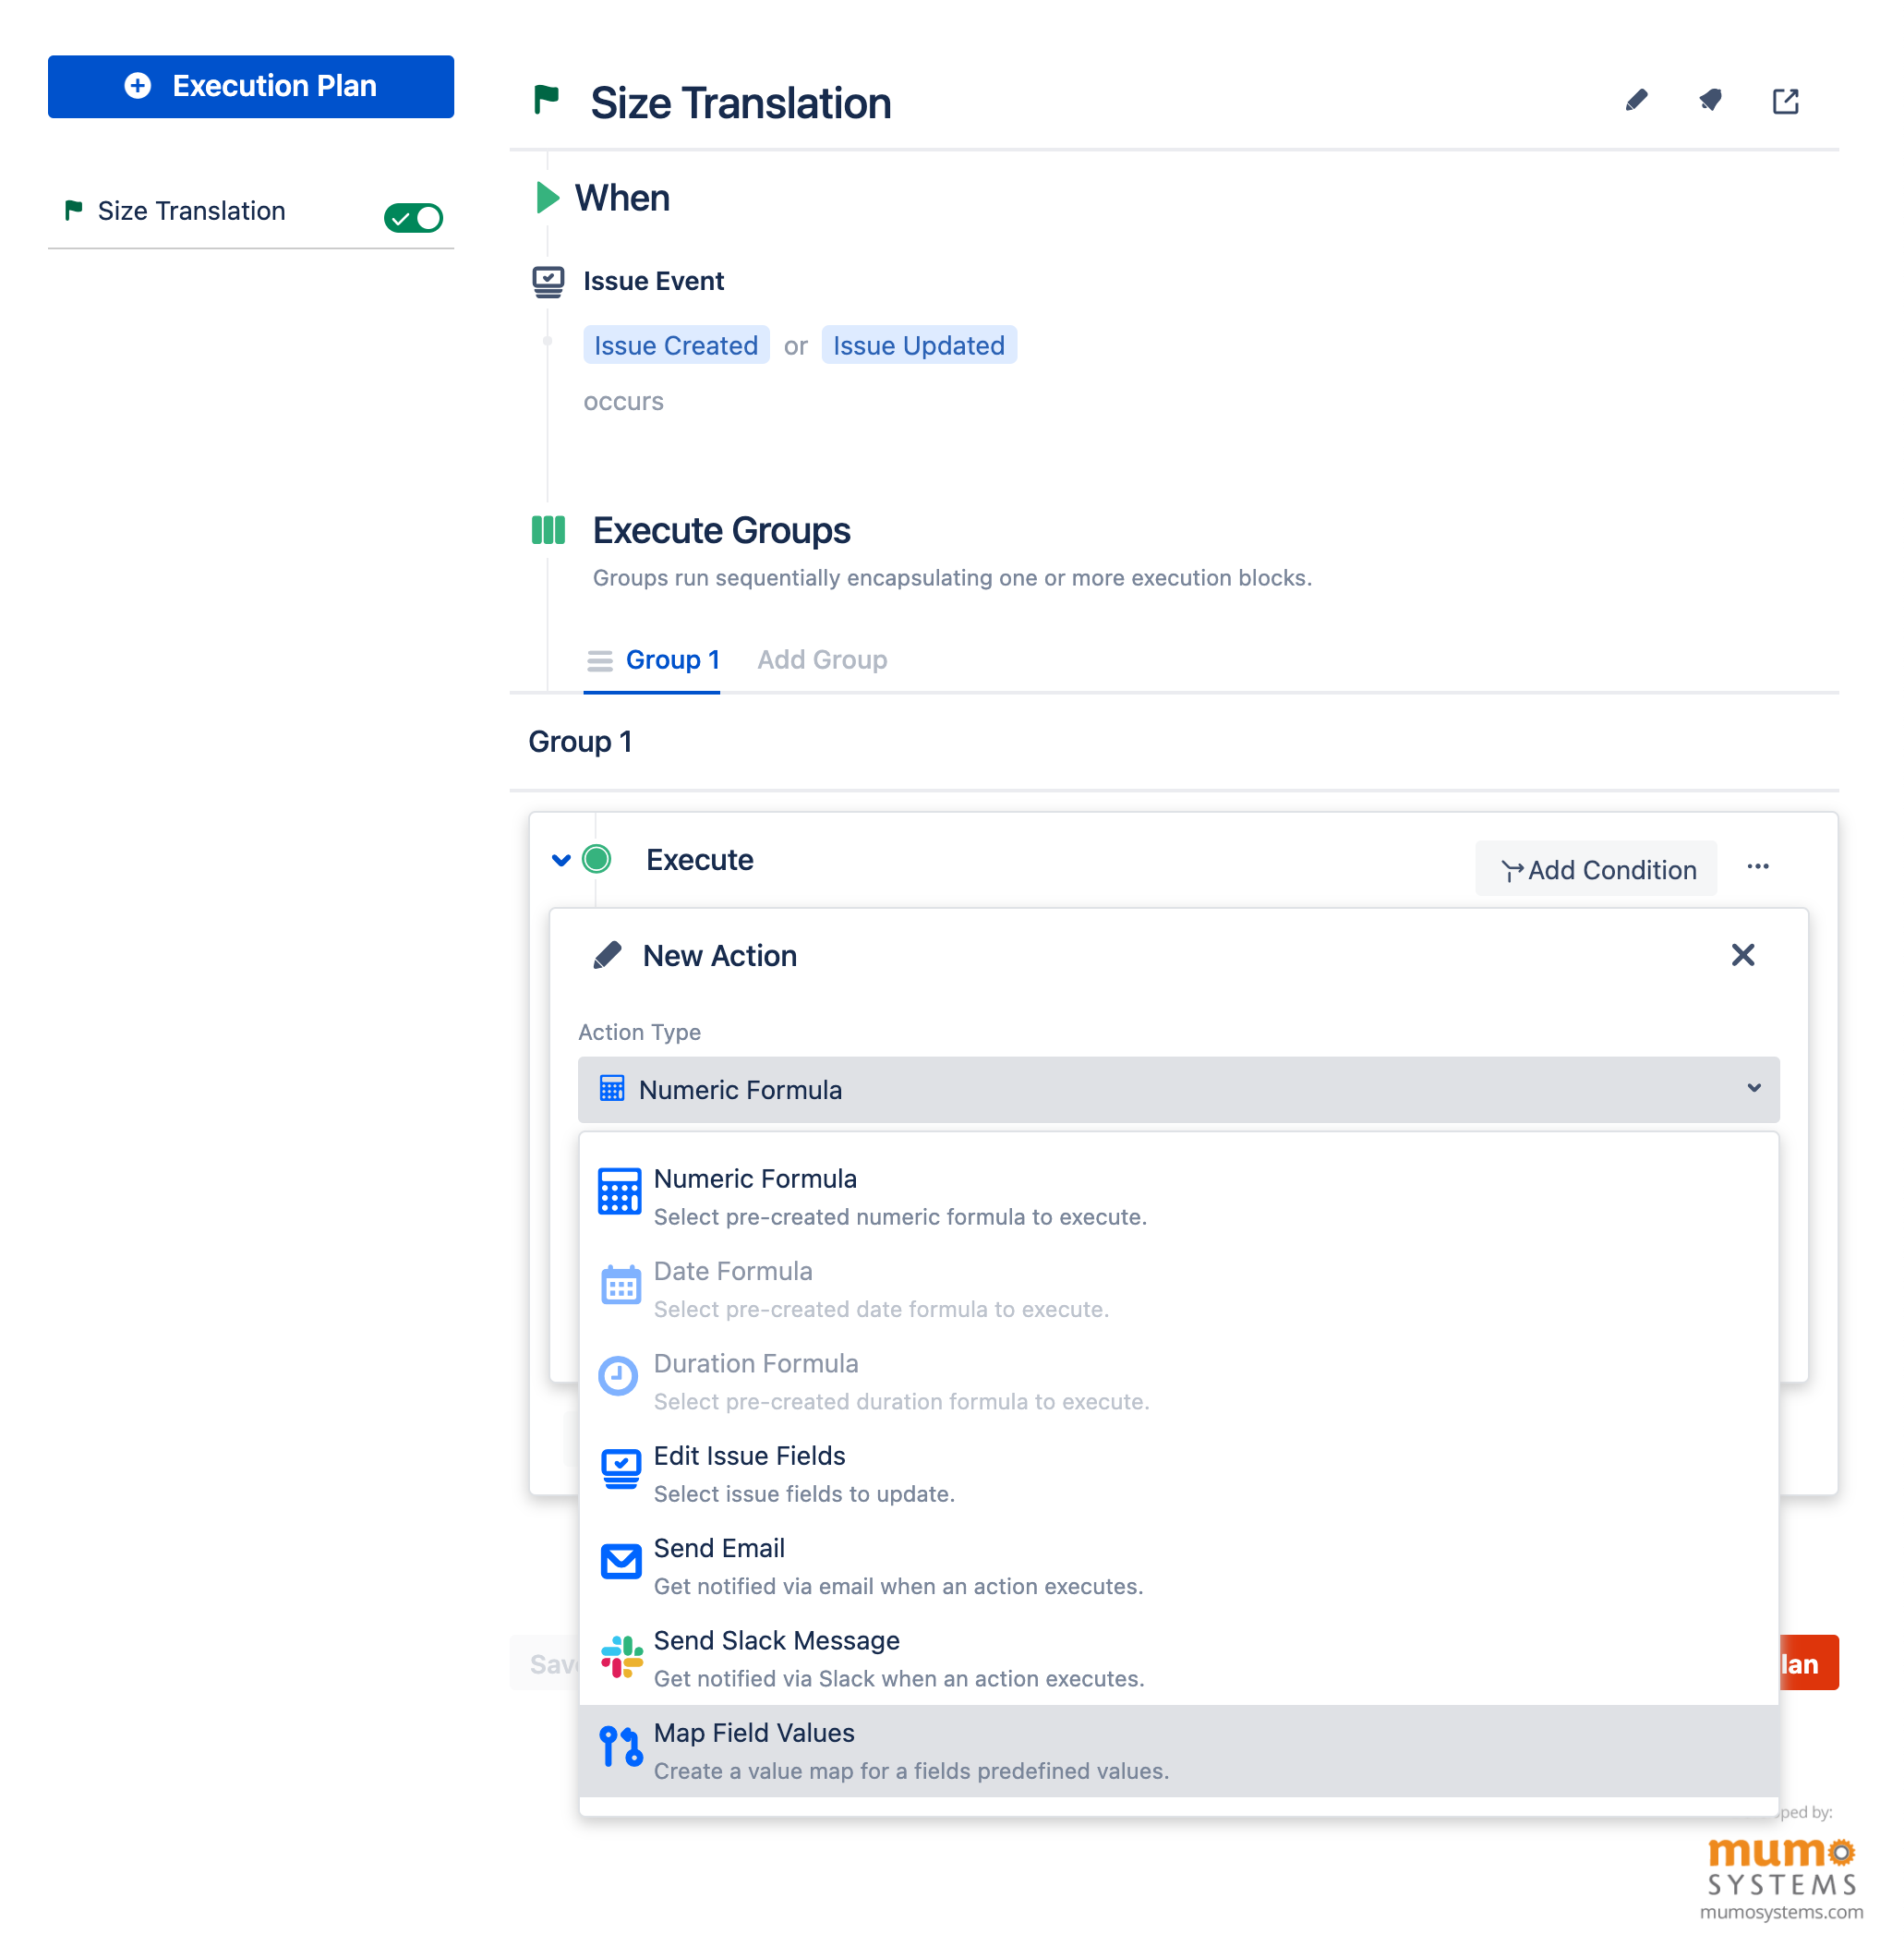
2. Create The Execution Plan
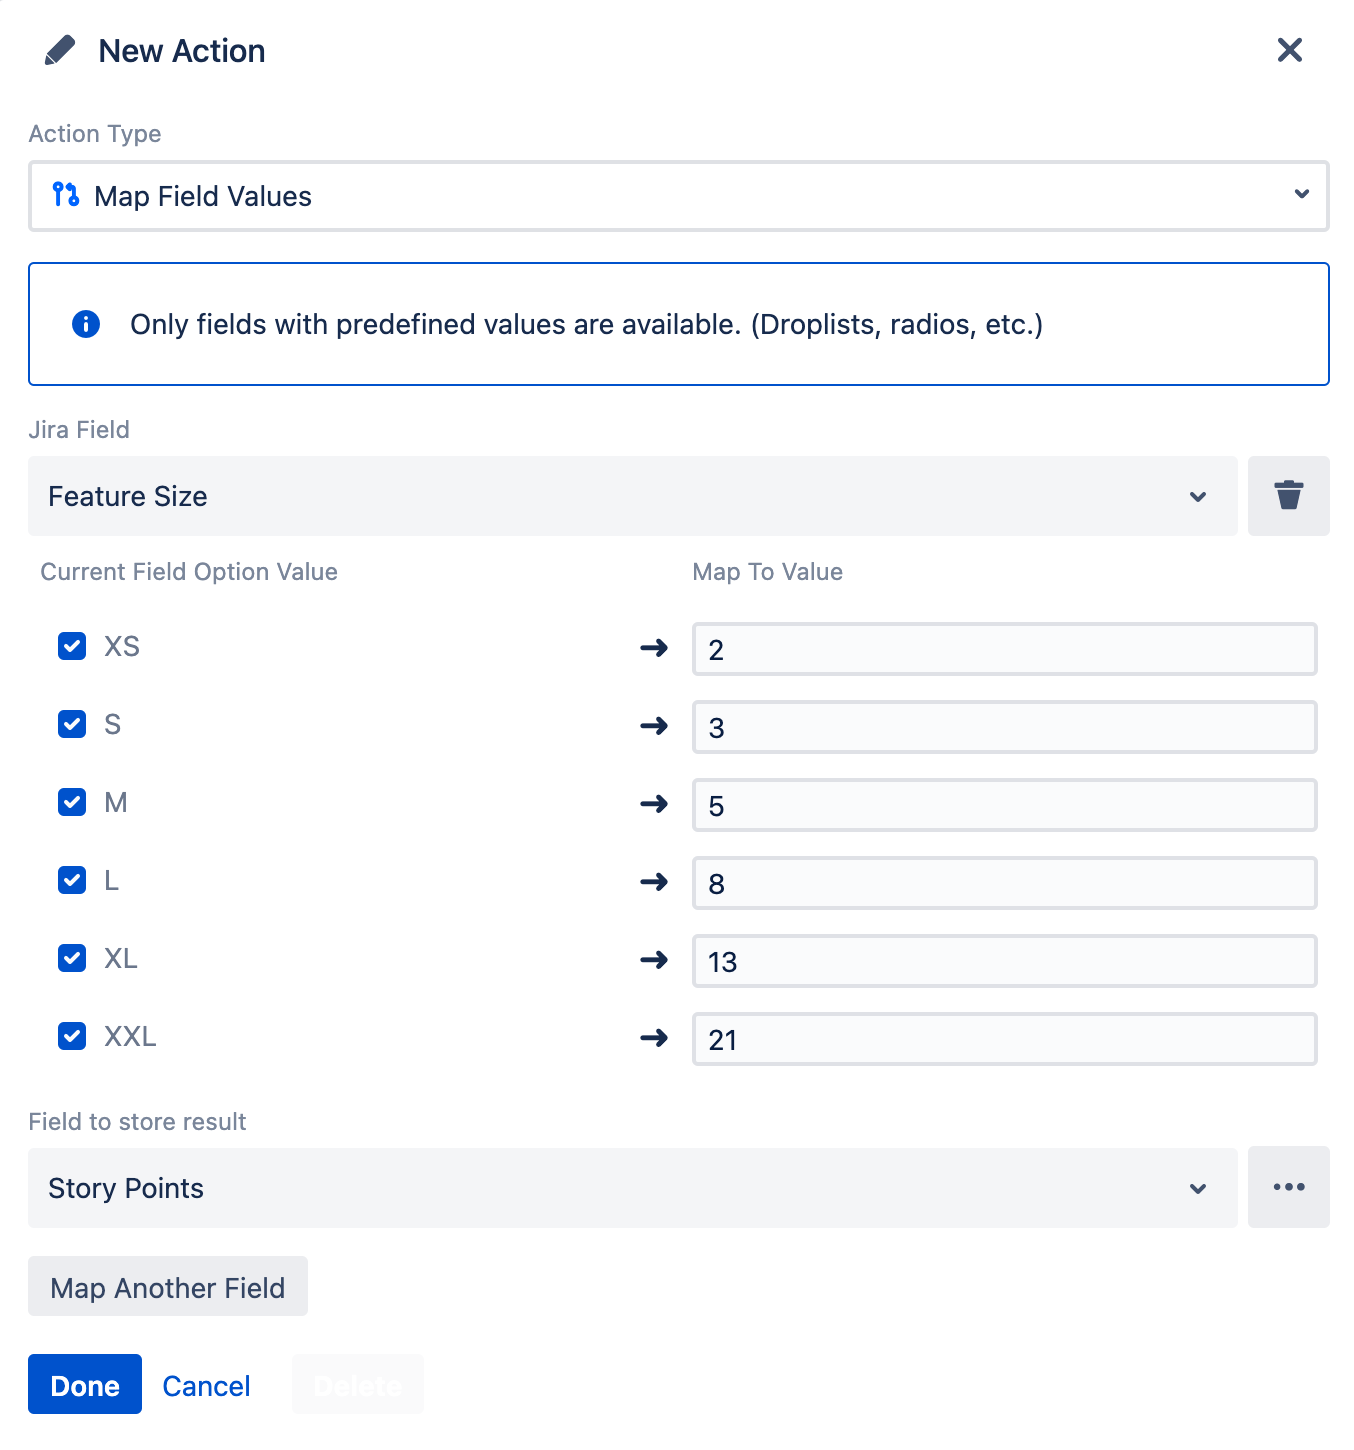
We need to create an execution plan to trigger our desired field translation. Begin by setting the Issue Event triggers - in this example, we want to trigger the translation immediately when the issue is created and any time the issue is updated thereafter. Next, select Add Action, set Action Type to Map Field Values. Map your Feature Size values to story point values (in the example, we're using Fibonacci numbers starting from 2).
Finally, we need to store the result of the mapping to the Story Points field. Click the Options (...) button and select Store Value in Field. Select Story Points with the dropdown selector, and then select Done.
The execution plan
Modify this execution plan to suit your needs!
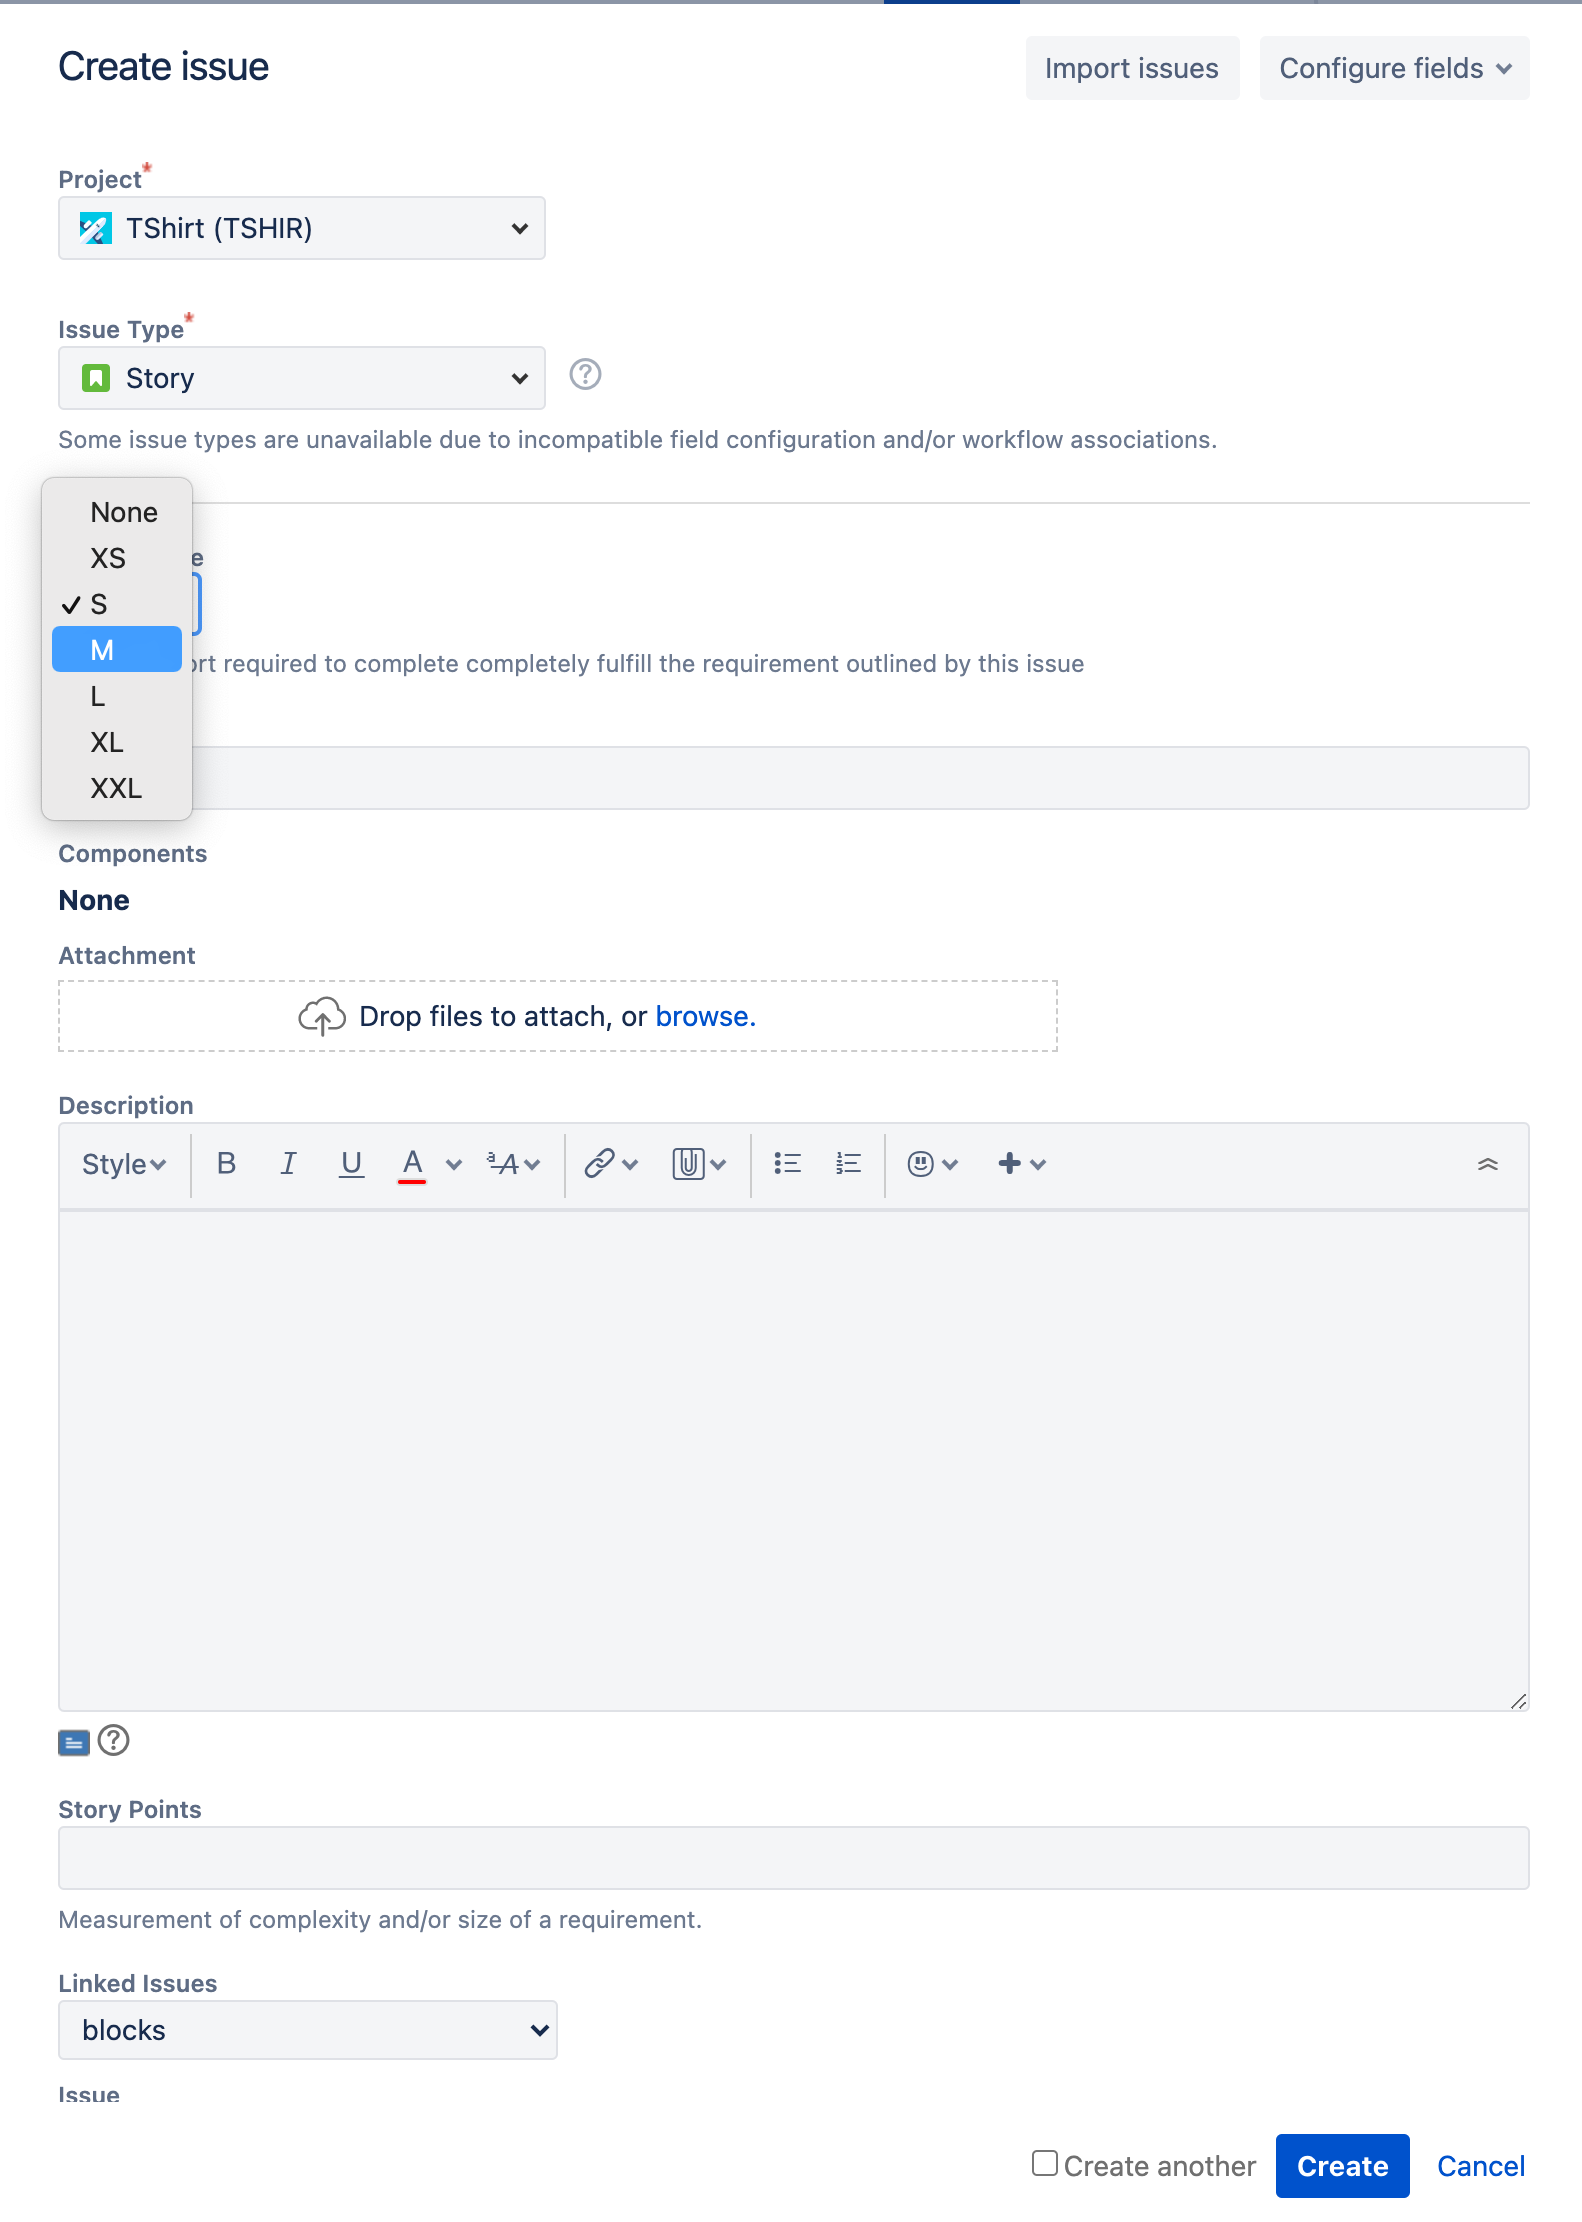
3. Get to work!
As your team begins filling your backlog with issues, Abacus watches for issue creation and springs into action, dutifully setting the Story Points field according to the mapping we set up in the previous step. If your team decides to change the Feature Size of an issue at a later date, no sweat - we've told Abacus to watch for updates too!
Estimation on your terms
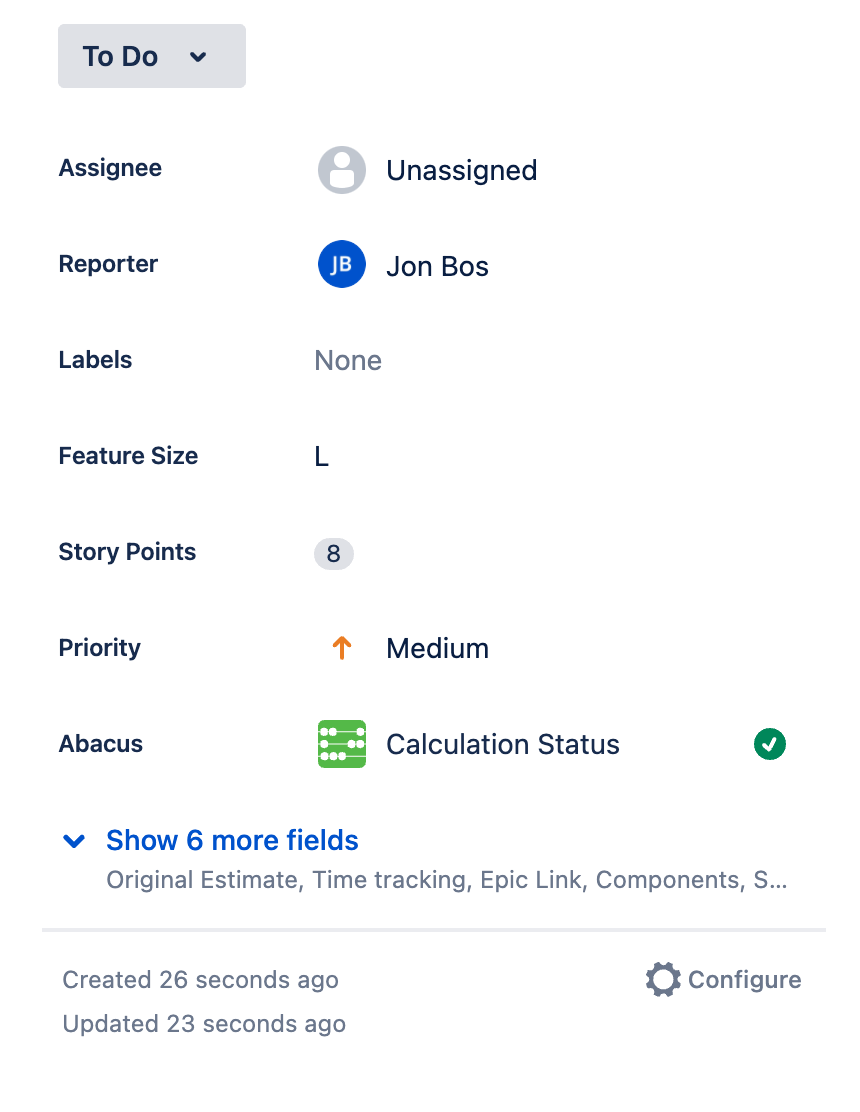 Abacus doing the heavy lifting
4. Sweet rewards
Because your Story Points field is automatically populated by Abacus, your team can benefit from all of the native Story Point integrations Jira offers. Use them to set Estimation Statistics on Boards, or in the creation of Reports and/or Dashboards.
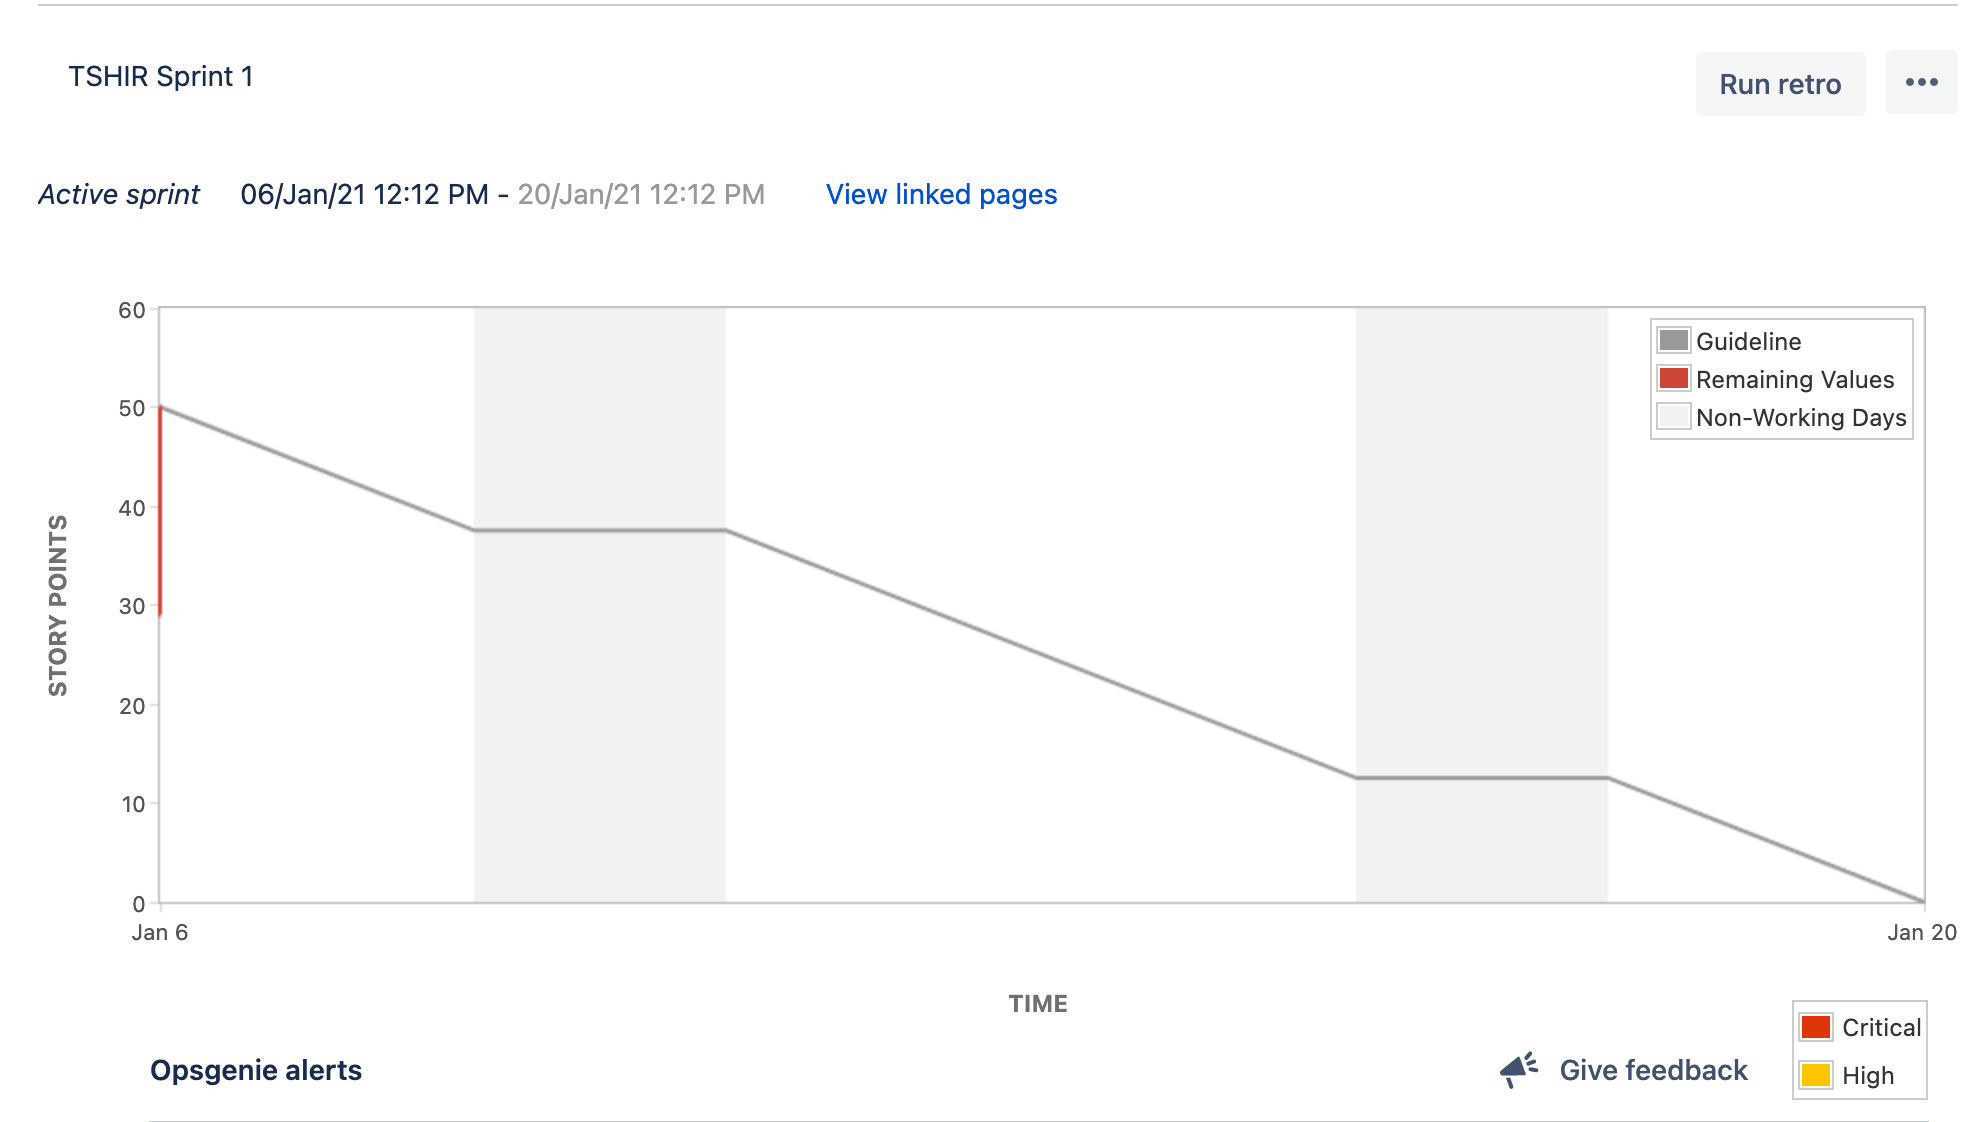
A Sprint Report
In Summary
Jira is a fantastic tool for helping your team get work done - it's flexible, user-friendly, and it provides extremely powerful reporting features. But sometimes an Agile team's requirements will extend beyond what Jira can provide out-of-the-box. When this happens, turn to Abacus - the highly configurable Jira calculator.
Recent posts
-
 CheckoutOct 09, 2024
 -
 AtlassianSep 16, 2024
 -
 AIAug 13, 2024